Welcome to LTOApp Help
Follow this step-by-step guide to create your account, submit your request, upload documents, make payment when required, and track your transaction until completion.
Quick Process Overview
- Create or log in to your account
- Enter customer and vehicle details
- Upload the required documents
- Wait for review and quotation
- Submit payment or proof of payment
- Track approval and completion
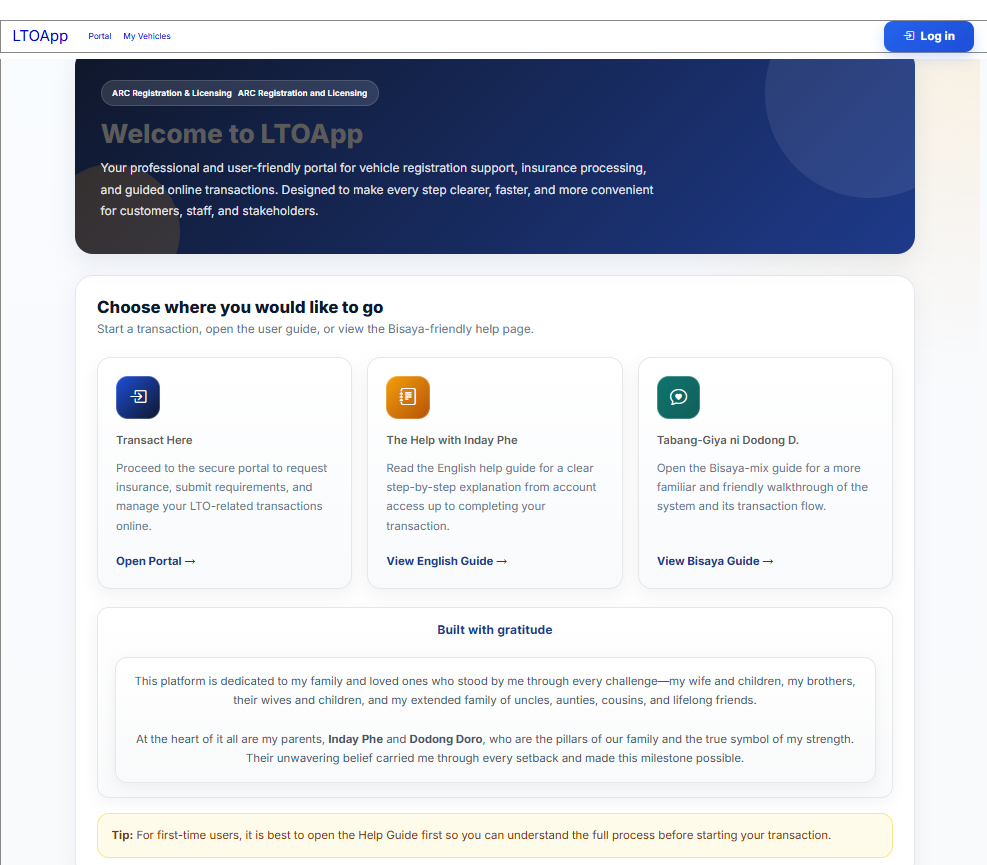
Start from the LTOApp Landing Page
The landing page gives users clear options to begin their transaction or read the guide before proceeding. This is helpful for first-time users.
- Open Portal to start a transaction
- View English Guide for step-by-step instructions
- View Bisaya Guide for a more familiar walkthrough
Before You Start
Prepare the following to make your transaction faster and smoother.
Active Email Address
Use an email address that you can access for notifications, updates, and account recovery.
Active Mobile Number
Use a valid mobile number for OTP verification, SMS alerts, and status updates.
Vehicle Details Ready
Prepare your plate number, MV file number, engine number, chassis number, and year model.
Clear Document Copies
Make sure your uploaded files are clear, complete, and readable.
Ready for Payment
Prepare the correct payment amount and valid proof of payment when required.
Stable Internet Connection
A stable internet connection helps avoid interrupted uploads and incomplete submissions.
Who Should Use This Guide
First-Time Users
Users who are creating an account and submitting an insurance COC request for the first time.
Returning Customers
Users who already have an account and want to submit another request or track a previous transaction.
Customers Needing Guidance
Users who need clear instructions for uploading files, submitting requirements, and understanding statuses.
Step-by-Step Guide
Create an Account or Log In
Use your account to securely access your requests, uploads, and transaction history.
Login Page
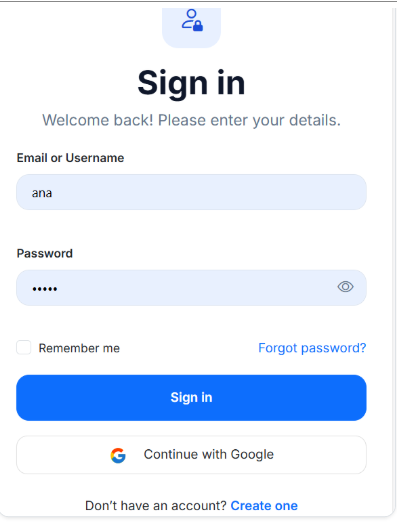
- Enter your Email or Username
- Enter your Password
- Click Sign in
- Use Forgot password? if you need account recovery
- Don’t have an account? Click Create one to register and get started
Register Page
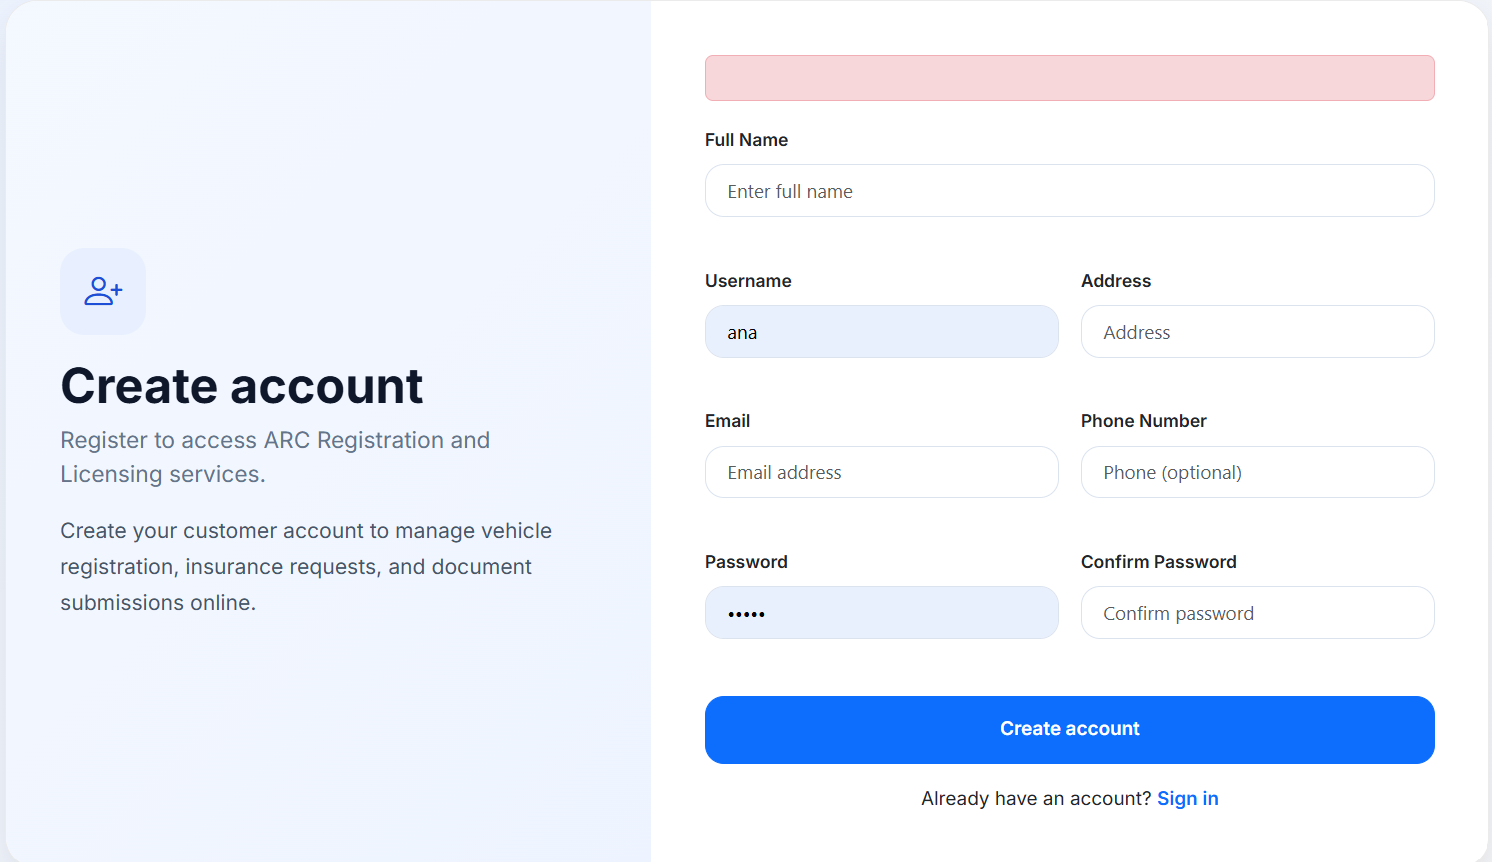
- Fill in your Full Name
- Provide your Username, Email, and optional Phone Number for notifications
- Create and confirm your password
- Click Create account
Forgot Password
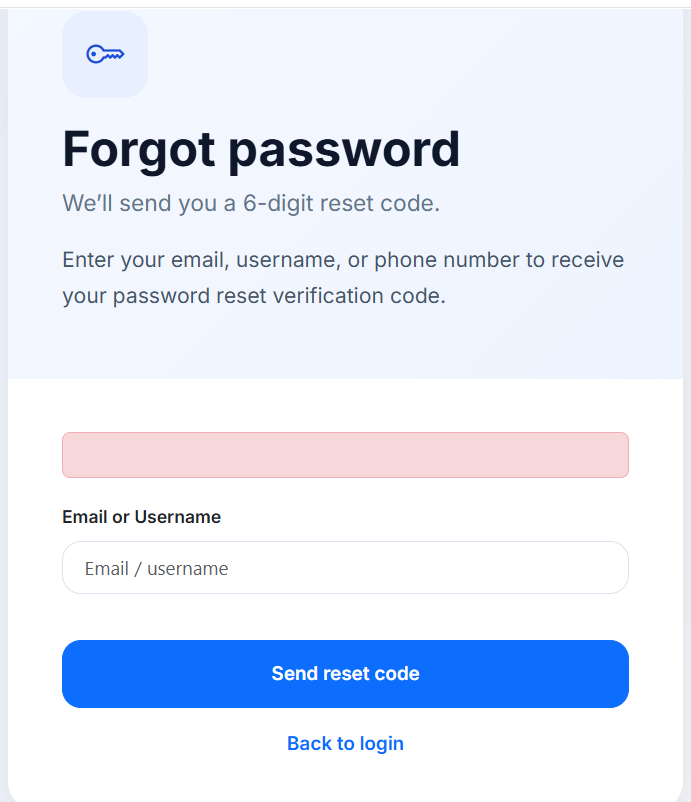
Enter your email, username, or phone number to receive your reset verification code. Follow the instructions sent by the system to recover access to your account.
Helpful Notes
- Use valid information to avoid account recovery problems later
- Keep your password secure and do not share it
- Use a reachable mobile number if SMS notifications are enabled
- Make sure your email inbox can receive verification or reset messages
Open the Portal and Start a Request
After login, proceed to the customer portal where you can begin your insurance COC request.
Landing Page After Login
Complete Your Request
Follow the guided steps to enter your details and submit your request.
- Enter the required information in each step of the form
- Prepare clear photos of your documents before uploading
- Upload at least the Official Receipt (OR) and Certificate of Registration (CR) to proceed with evaluation
- Review your entries to ensure all details are correct
- Confirm your authorization by selecting the required checkboxes
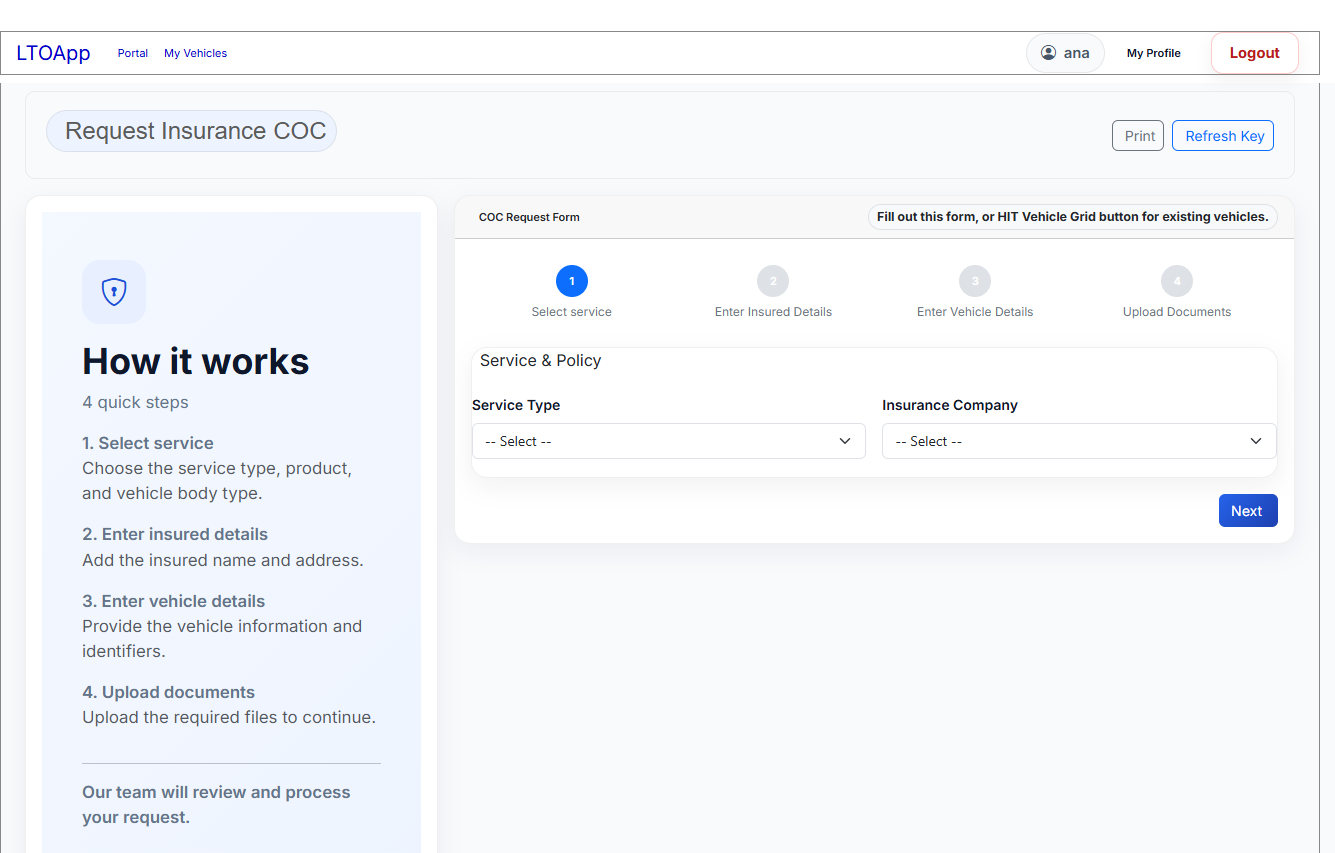
Select Service and Insurance Company
Choose the correct service type and insurance provider before proceeding.

Step 1: Select Service
- Select a Service Type based on your transaction
- Choose your preferred Insurance Company
- Make sure both fields are selected before proceeding
- Click Next to continue to the next step
Enter Insured Details
Provide the name and complete address of the insured person.
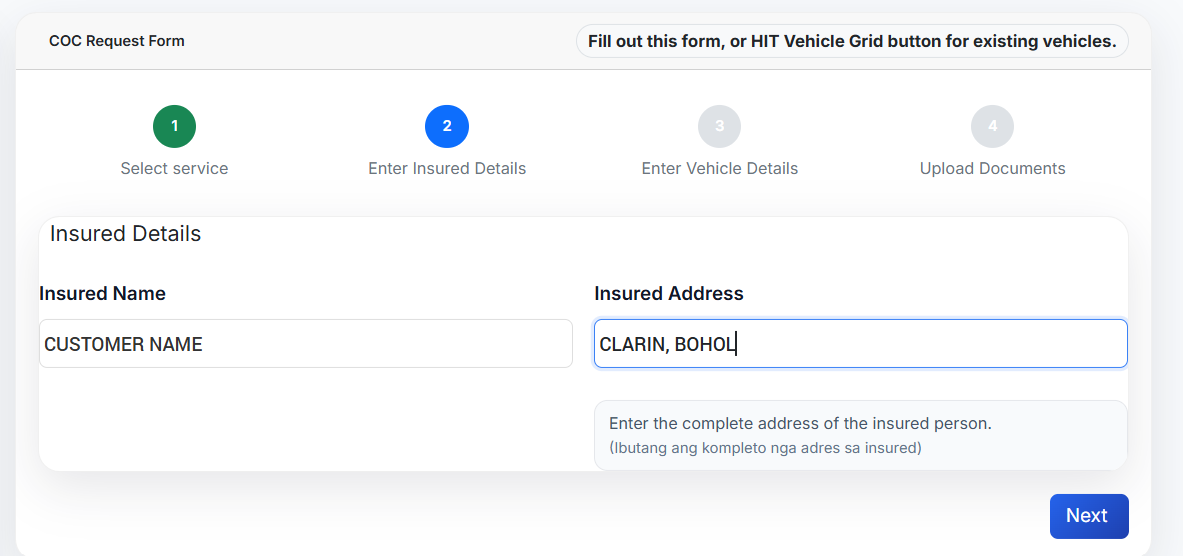
Step 2: Enter Insured Details
- Enter the full insured name correctly
- Use a complete address
- Avoid abbreviations that may create verification issues
- Click Next after reviewing the information
Enter Vehicle Details
Accurate vehicle details are critical for correct insurance processing and document validation.
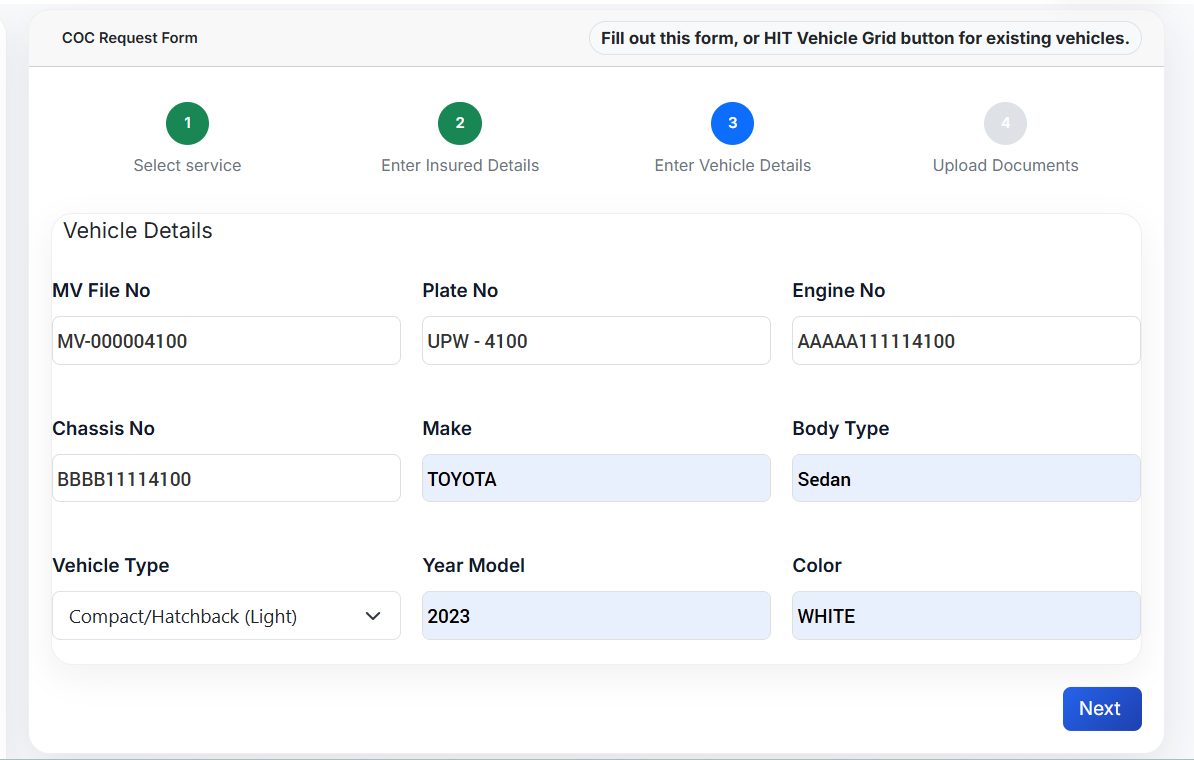
Step 3: Enter Vehicle Details
- MV File Number
- Plate Number
- Engine Number
- Chassis Number
- Vehicle Type
- Year Model
- Make / Body Type / Color if required
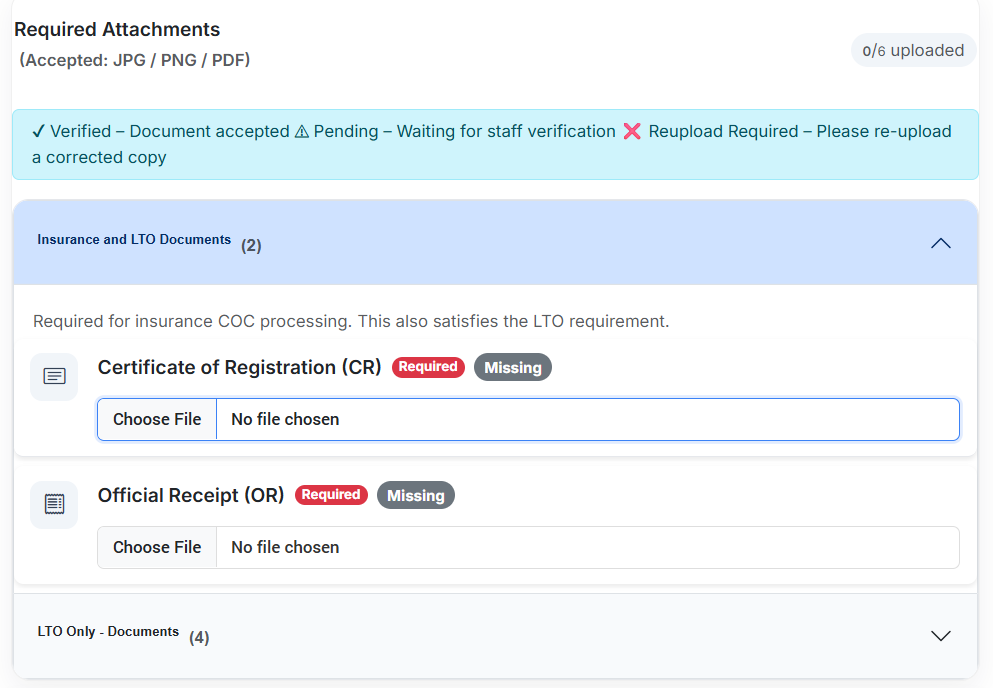
Upload the Required Documents
Upload readable and complete files to help staff review your request faster.
Insurance and LTO Documents

Accepted File Types
JPG / PNG / PDF
Insurance and LTO Documents
- Certificate of Registration (CR)
- Official Receipt (OR)
LTO Only - Documents
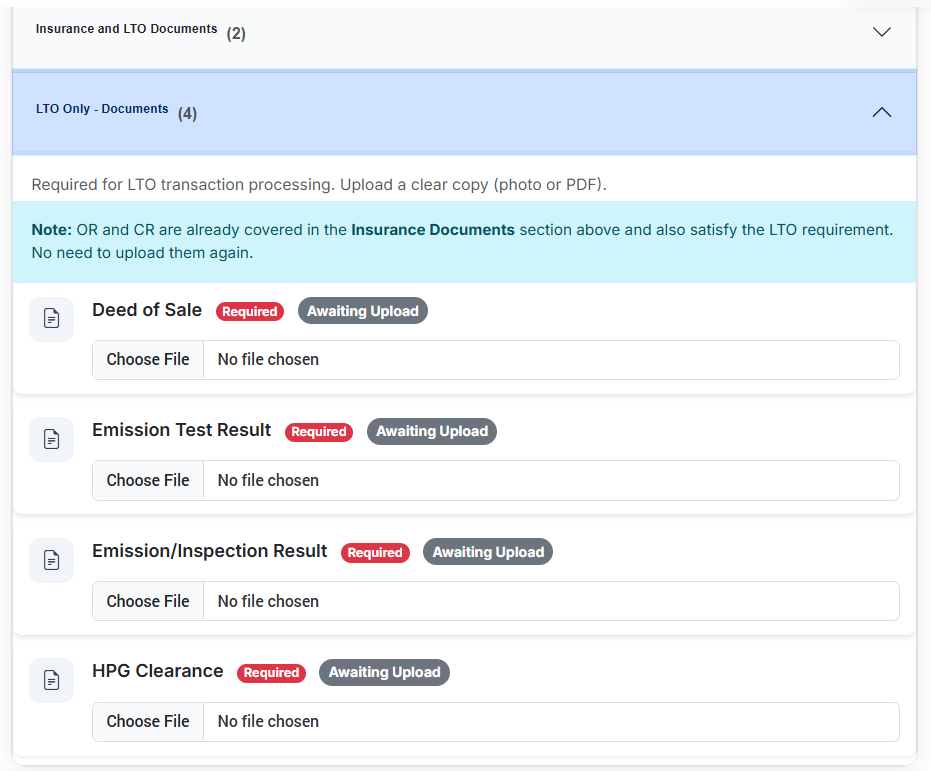
Required Attachments
- Certificate of Registration
- Official Receipt
- Emission Test Result
- Inspection Result
- Franchise Documents
- Business Permit
- Deed of Sale
- HPG Clearance
- Joint Affidavit
- Affidavit of Loss
- Valid ID
- SPA
- Letter of Authorization
How to Upload File Attachments
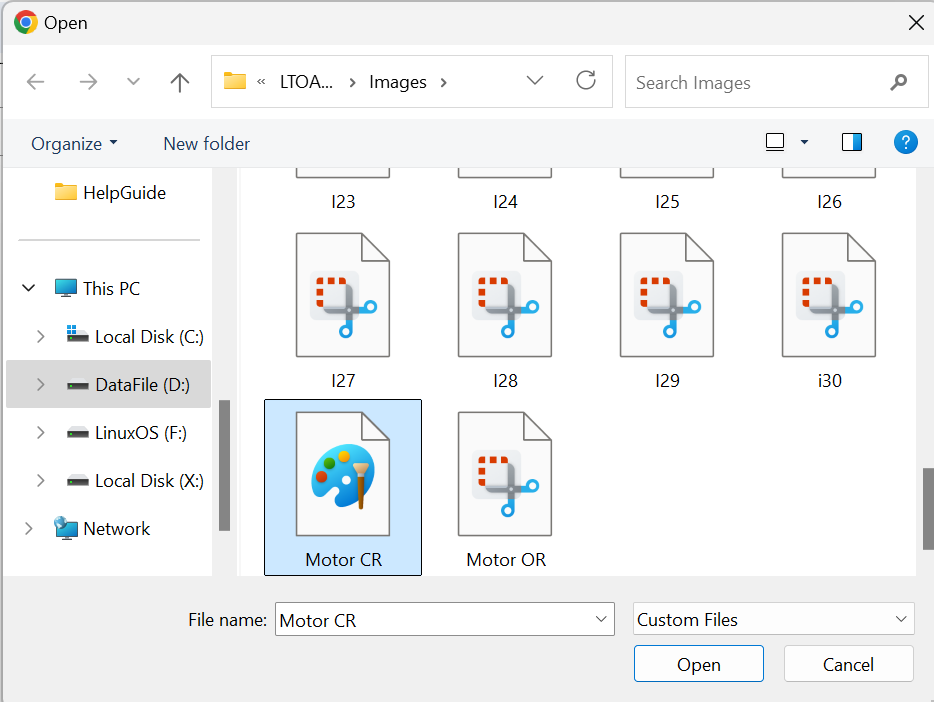

How to Upload Files
- Click the Choose File button beside the document
- Select the file from your device
- Click Open to confirm your selection
- The selected file name will appear beside the button
- Repeat the process for all required documents
Confirm Authorization and Submit
Before submission, confirm your authorization and the validity of your documents.
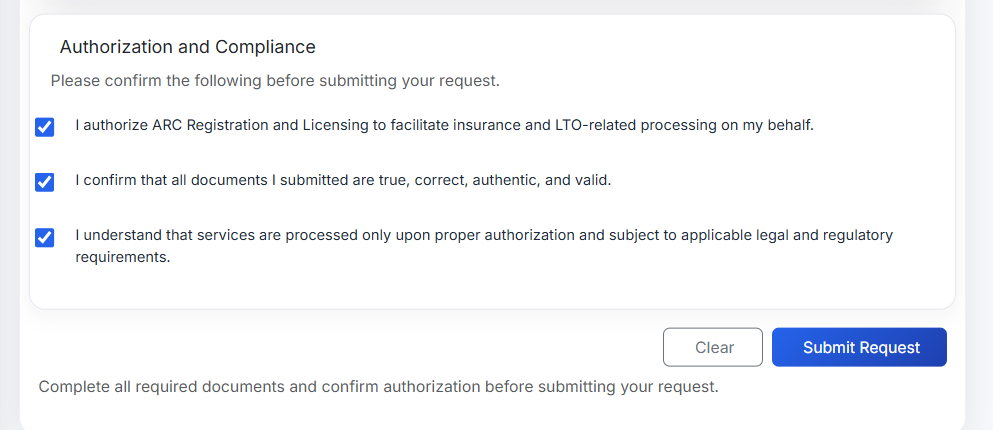
Before Clicking Submit Request
- Confirm authorization for ARC Registration and Licensing to process your request
- Confirm that the submitted documents are correct and valid
- Review all details one last time
- Click Submit Request
Requirements Checklist
Account Requirements
- Valid email address
- Username and password
- Optional but recommended mobile number
Transaction Requirements
- Vehicle details
- Insured details
- Clear uploads of required supporting documents
Payment Guide
When Payment Is Needed
Payment is usually made after your request has been reviewed and the quotation or billing details have been provided by staff.
Proof of Payment
Submit clear and correct proof of payment when requested. Unclear or incomplete proof may delay verification.
Common Statuses
Your request was received and is waiting for review.
Staff has checked your request and may proceed with quotation or next processing steps.
There is something that needs correction or re-upload before processing can continue.
Your request is moving forward in the operational process.
There is a payment concern that must be resolved before proceeding.
Your request has been approved or successfully completed.
Delays and Helpful Tips
Common Causes of Delay
- Incorrect vehicle details
- Missing or blurred documents
- Unclear proof of payment
- Incomplete insured information
- Failure to respond to returned or reupload requests
Best Practices
- Double-check all entries before submission
- Upload only readable files
- Track your account regularly for updates
- Respond quickly if staff asks for corrections
- Keep your contact details updated
Frequently Asked Questions
Need More Help?
If you need assistance, contact ARC Registration & Licensing support or wait for staff guidance through your account notifications, email, or SMS, depending on your system setup.
- Check your transaction status regularly
- Respond promptly to correction requests
- Keep your account details updated